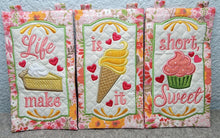
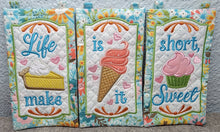
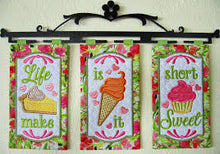
Join Jeane for a Free Sew Along for Janine Babich's Life is Short, make it Sweet Project. This FREE Youtube Livestream will be hosted on our Youtube chanel on April 28, from 10:30am-1:30pm PST.
Click HERE for the project design.
Click HERE for the fabric kit options.
Click HERE for the optional thread kit.
Supply list: Janine Babich Life is Short, Make it Sweet Table Top Display
Description: Find your joy in the little things, for they are the true essence of happiness.' Stitch a yummy 'Made in the Hoop' trio of tasty treats that add a touch of sweetness to life. Finished size: 16" x 11" when displayed in the Trip Tic stand or tri- panel wall hanger. Requires a 5 3/4" x 8" hoop.
You will learn machine embroidery applique while making this fun and easy table top display. Great for beginners and seasoned pros.
What to Bring:
-
Embroidery machine with embroidery foot attached and embroidery arm
-
Each Panel is about 5” x 8” so, you can use a 6” x 10” hoop, a 7” x 12”, an 8” x 8” or 8” an 8” x 12”. If you use an 8x12 or larger, you can fit more than one panel in a hooping. If you use a 9.5” x 14” you can do all 3 panels in one hooping. For the Sew Along, I will be using a 9.5” x 14” hoop.
-
Janine Babich Life is Short, Make it Sweet Table Top Display Embroidery Design (LINK to purchase)
-
4” x 9” Table top Tri-stand LINK (optional but available at A1)
-
Or Ackfeld Babich Crown Trip Tic 15in # 38132 OR Babich Flower Arch Trip Tic 16in # 38142
-
75/11 Madeira Anti-glue needles, 80/12 Microtex needles or other embroidery needles of your choice (A1)
-
(2) Prewound bobbins with machine embroidery bobbin thread (A1)
-
Spray adhesive like Gunold KK100
-
Applique scissors, double curved scissors or snips (A1)
-
Assorted embroidery thread in colors that match and complement your fabric (A1). These are the Glide thread colors that I used for the Turquoise colorway: Clover, Ginger, Linen, Tango, Pink Lemonade, Sand Castle, Buttercup, Magic Mint and Robin Egg
Pink Colorway:
Pink Colorway: Ginger, Sand Castle, Taffy, Pink Lemonade, Clover, Linen, Raspberry, Pumpkin Seed and Buttercup
-
Seam ripper (just in case) (A1)
-
Steam-a-seam 2 tape in the ¼” width (A1) OPTIONAL
-
Transpore tape or Kimberbell tape or comparable (A1)
-
Corner turner, like the OESD Expert Point & Press (A1)
-
Fabric scissors to trim corners (A1)
-
Small quilting ruler with cutting mat
Fabric requirements: Fabric kits are sold out. =(
-
Fabric as per the instructions
-
If your center background fabric is light (the 7” x 12” piece of fabric), you’ll need to apply shapeflex so the background fabric doesn’t shadow through
-
Fusible Fleece (Thermolam Plus recommended) LINK cut to (6) 4 ⅛” x 7 ½”
-
Medium weight tearaway stabilizer is recommended. I prefer cutaway medium or heavy for this project
-
12 inches of ½” or 5/8” wide grosgrain ribbon – for loops to hang design, OR you can make your own loops. I did mine with 2” x 12” of fabric.
Pre-class prep: Here is a link to a prep video: https://youtu.be/kaIOFgazUSM
-
Cut fabric as per the instructions
For Scan N Cut, cut fabric as follows and back all these pieces with Heat N Bond Lite:
-
7” x 12” accent fabric panel (fabric behind the embroidery and on top of the background fabric). If it is light in color, back it with Shape Flex 101 AND Heat n Bond Lite
-
Pie: 3.5” x 2.5”
-
Ice Cream: 3” x 2.75”
-
Ice Cream Cone: 2.5” x 3.5”
-
Cupcake Frosting: 3” x 2.75”
-
Cupcake Wrapper: 2.75” x 2”
CLASS SUPPLIES ARE 15% OFF AT A1.
Color stitch out list for Pink Colorway:
PIE PANEL
-
Step 1 - PINK LEMONADE Placement stitch for Thermolam and Background fabric
-
Step 2 - PINK LEMONADE Tack down of background fabric and placement stitch for Accent Fabric
-
Step 3 - LINEN Tack down of accent fabric and quilting
-
Step 4 - CLOVER Satin stitch border for Accent Fabric
-
Step 5 - PUMPKIN SEED Flourishes above and below the lettering
-
Step 6 - TAFFY Lettering
-
Step 7 - GINGER Pie shading and applique cut line
-
Step 8 - GINGER Pie filling Satin Stitch perimeter
-
Step 9 SAND CASTLE Pie Crust and placement stitch for whip cream
-
Step 10 LINEN Tack down for Whip Cream - Trim
-
Step 11 LINEN Whip Cream Satin stitch
-
Step 12 RASPBERRY Dancing Hearts
-
Step 13 PINK LEMONADE Back attachment Line
ICE CREAM PANEL
-
Step 1 - PINK LEMONADE Placement stitch for Thermolam and Background fabric
-
Step 2 - PINK LEMONADE Tack down of background fabric and placement stitch for Accent Fabric
-
Step 3 - LINEN Tack down of accent fabric and quilting
-
Step 4 - CLOVER Satin stitch border for Accent Fabric
-
Step 5 - PUMPKIN SEED Flourishes above and below the lettering
-
Step 6 - TAFFY Lettering
-
Step 7 - SAND CASTLE Cone detail stitching and applique tack down
-
Step 8 - SAND CASTLE Cone Satin stitch and placement for Ice cream
-
NOTE - IF YOUR ICE CREAM FABRIC IS CUT TO SIZE, SKIP STEP 9
-
Step 9 PUMPKIN SEED Ice Cream fabricTack down and trim
-
Step 10 PUMPKIN SEED OR BUTTERCUP OR PINK LEMONADE Ice cream satin stitch
-
Step 11 RASPBERRY Dancing Hearts
-
Step 12 PINK LEMONADE Back attachment Line
CUPCAKE PANEL
-
Step 1 - PINK LEMONADE Placement stitch for Thermolam and Background fabric
-
Step 2 - PINK LEMONADE Tack down of background fabric and placement stitch for Accent Fabric
-
Step 3 - LINEN Tack down of accent fabric and quilting. Trim if not cut to size
-
Step 4 - CLOVER Satin stitch border for Accent Fabric
-
Step 5 - PUMPKIN SEED Flourishes above and below the lettering
-
Step 6 - TAFFY Lettering
-
Step 7 - CLOVER or ALOE Cupcake wrapper detail stitching and applique tack down. Trim if not cut to size
-
Step 8 - CLOVER OR ALOE Wrapper satin stitch and placement stitch for cupcake frosting
-
NOTE - IF YOUR FROSTING FABRIC IS CUT TO SIZE, SKIP STEP 9
-
Step 9 TAFFY Frosting fabricTack down and trim
-
Step 10 TAFFY Frosting satin stitch
-
Step 11 RASPBERRY Dancing Hearts
-
Step 12 PINK LEMONADE Back attachment Line
Color stitch out list for Turquoise Colorway:
PIE PANEL
-
Step 1 - MAGIC MINT Placement stitch for Thermolam and Background fabric
-
Step 2 - MAGIC MINT Tack down of background fabric and placement stitch for Accent Fabric
-
Step 3 - LINEN Tack down of accent fabric and quilting
-
Step 4 - CLOVER Satin stitch border for Accent Fabric
-
Step 5 - BUTTERCUP Flourishes above and below the lettering
-
Step 6 - ROBIN EGG Lettering
-
Step 7 - GINGER Pie shading and applique cut line
-
Step 8 - GINGER Pie filling Satin Stitch perimeter
-
Step 9 SAND CASTLE Pie Crust and placement stitch for whip cream
-
Step 10 LINEN Tack down for Whip Cream - Trim
-
Step 11 LINEN Whip Cream Satin stitch
-
Step 12 PINK LEMONADE Dancing Hearts
-
Step 13 MAGIC MINT Back attachment Line
ICE CREAM PANEL
-
Step 1 - MAGIC MINT Placement stitch for Thermolam and Background fabric
-
Step 2 - MAGIC MINT Tack down of background fabric and placement stitch for Accent Fabric
-
Step 3 - LINEN Tack down of accent fabric and quilting
-
Step 4 - CLOVER Satin stitch border for Accent Fabric
-
Step 5 - BUTTERCUP Flourishes above and below the lettering
-
Step 6 - ROBIN EGG Lettering
-
Step 7 - SAND CASTLE Cone detail stitching and applique tack down
-
Step 8 - SAND CASTLE Cone Satin stitch and placement for Ice cream
-
NOTE - IF YOUR ICE CREAM FABRIC IS CUT TO SIZE, SKIP STEP 9
-
Step 9 TANGO Ice Cream fabricTack down and trim
-
Step 10 TANGO Ice cream satin stitch
-
Step 11 PINK LEMONADE Dancing Hearts
-
Step 12 MAGIC MINT Back attachment Line
CUPCAKE PANEL
-
Step 1 - MAGIC MINT Placement stitch for Thermolam and Background fabric
-
Step 2 - MAGIC MINT Tack down of background fabric and placement stitch for Accent Fabric
-
Step 3 - LINEN Tack down of accent fabric and quilting. Trim if not cut to size
-
Step 4 - CLOVER Satin stitch border for Accent Fabric
-
Step 5 - BUTTERCUP Flourishes above and below the lettering
-
Step 6 - ROBIN EGG Lettering
-
Step 7 - CLOVER or ALOE Cupcake wrapper detail stitching and applique tack down. Trim if not cut to size
-
Step 8 - CLOVER OR ALOE Wrapper satin stitch and placement stitch for cupcake frosting
-
NOTE - IF YOUR FROSTING FABRIC IS CUT TO SIZE, SKIP STEP 9
-
Step 9 PINK LEMONADE Frosting fabricTack down and trim
-
Step 10 PINK LEMONADE Frosting satin stitch
-
Step 11 PINK LEMONADE Dancing Hearts
-
Step 12 MAGIC MINT Back attachment Line


